In Own Your Data (1) I introduced why I got my NAS and how to initially set it up. I also mentioned that QuickConnect (a service provided by Synology, can be enabled and set up in Control Panel -> External Access -> QuickConnect) can be used to access your NAS from outside your home network. A better option is to set up a domain name for your NAS.
First you need to understand how domain name works. When you’re trying to visit a website, you type in URL, instead of IP address. But IP address is how you access the target server. DNS (Domain Name System) is then used to “translate” domain name to IP address.
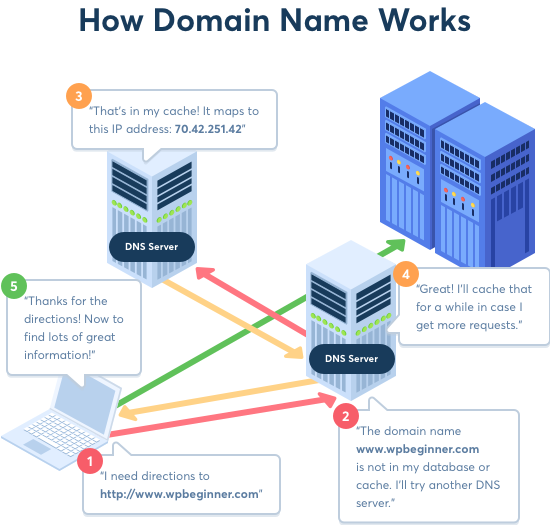
Same thing applies to your NAS. After you buy a domain name, you need to register it with the IP address of your NAS. However, most people’s home network is a connected via a router to the Internet – The router connects to the Internet, so it has a public IP address. However, everything else in your home is in the local network with a IP address assigned by your router, so they are only accessible inside your network.
DHCP now brings more trouble. To maximize the usage of IP addresses, ISPs usually dynamically assign your router a public IP, which means it can change from time to time. So we need DDNS (Dynamic DNS) to report your new IP address to DNS servers.
If you’re OK with a Not-so-customized Domain Name…
Synology provides DDNS services. Simply open Control Panel -> External Access -> DDNS, and select Synology in the dropdown menu of “Service Provider”.
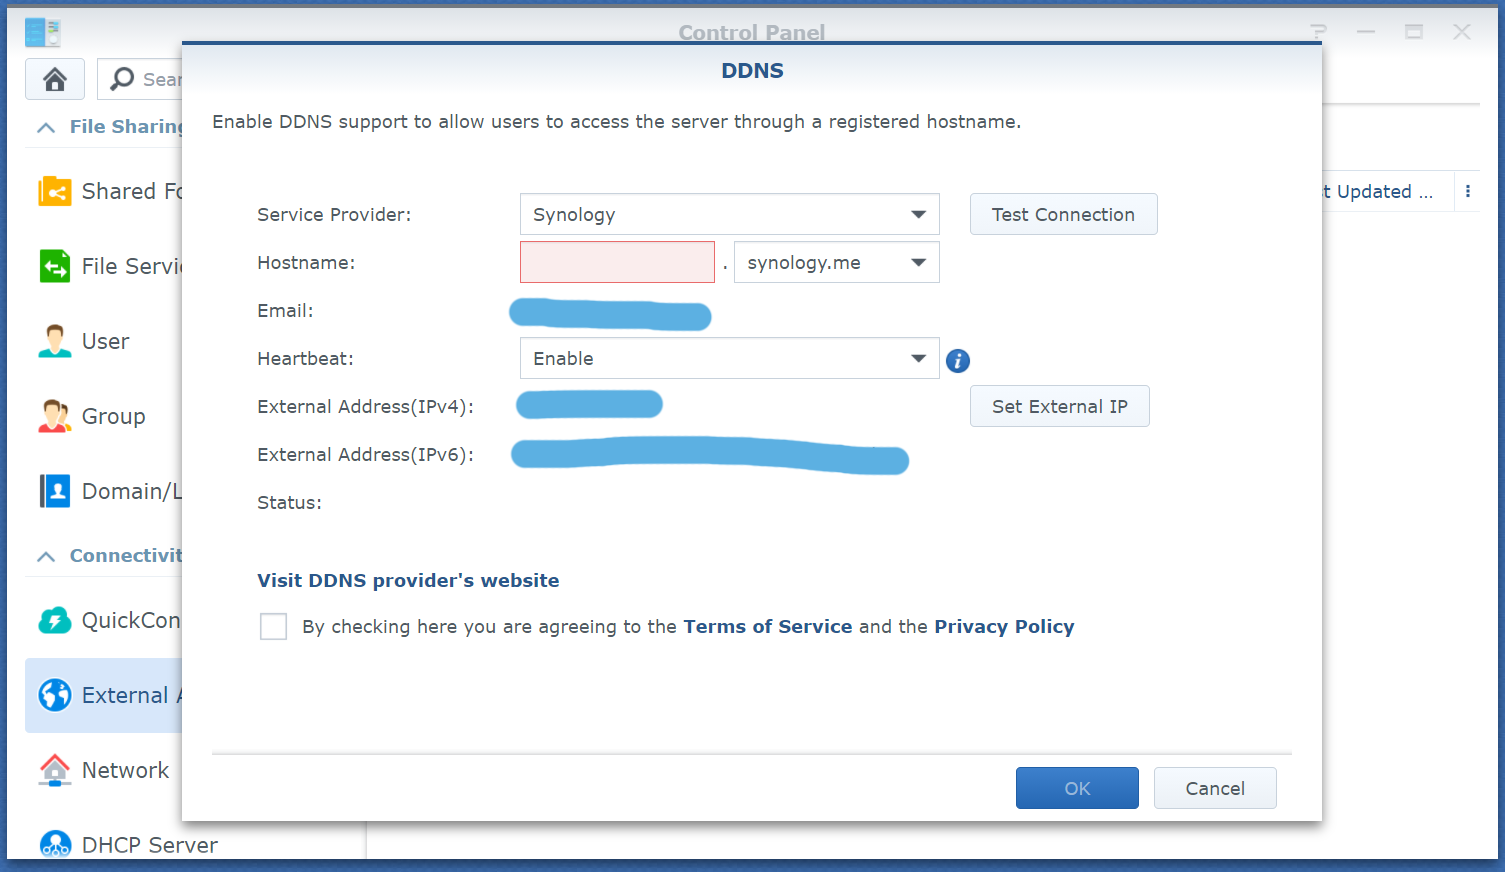
As you can see, you have a handful of top level domain names to choose from, but you can’t fully customize it. The only thing you can change freely is the subdomain. External IPv4 and IPv6 addresses are automatically detected from your router. After set up your subdomain name, you’re basically done.
If You Want Your Own Top Level Domain…
There are many places you can buy a domain name very cheap – sometimes $2.99 per year. I bought mine jian-home.com on GoDaddy.
Then you need to register an account with a DDNS service provider. I use No-IP, which is supported by my router (Netgear Nighthawk). No-IP costs $25 a year for DDNS service. I didn’t set up DDNS on NAS, instead I set it up on my router. But it’s the same procedure. With Synology, go to Control Panel -> External Access -> DDNS and select the service provider from the dropdown menu, and then type in your account information.
DNS information needs about 24 hours to propagate across the Internet. So after you set it up you probably can’t use your domain name immediately.
Port Forwarding
It’s not done yet. Now your domain name can be “translated” to the public IP address of your home network correctly, but your router doesn’t know where to send the request and which port to use since you have so many devices connecting to it. So you need to set up a bunch of rules to tell your router what to do if someone sends a request to port A (different ports are used for different applications – port 80 usually for http and port 443 for https, for example).
Here is some useful ports:
- 80 – http
- 443 – https
- 5000 – DSM (unsecure)
- 5001 – DSM (secure)
- 32400 – Plex
- 63198 – Plex Web
When set up port forwarding rules, you need to specify the 4 following fields: External IP address (source), External ports, Internal IP (Your NAS), Internal ports. Since you want to visit your NAS from anywhere in the world, the external IP address should be “Any”. And in this case, external ports are mapped to the same ones on your NAS.
Tip: You should be able to reserve an internal IP address for your NAS on the router, since DHCP is also used to assign IP addresses internally, and next time the router is restarted, IP address of NAS may change if it’s not reserved.
Certificate – SSL
Certificate should be installed on your NAS, or every time you visit, the browser will complain the connection is not safe. If a website is hosted on NAS, it’s more important to have a certificate because people want to make sure they are visiting a genuine, real website (not fake or phishing ones).
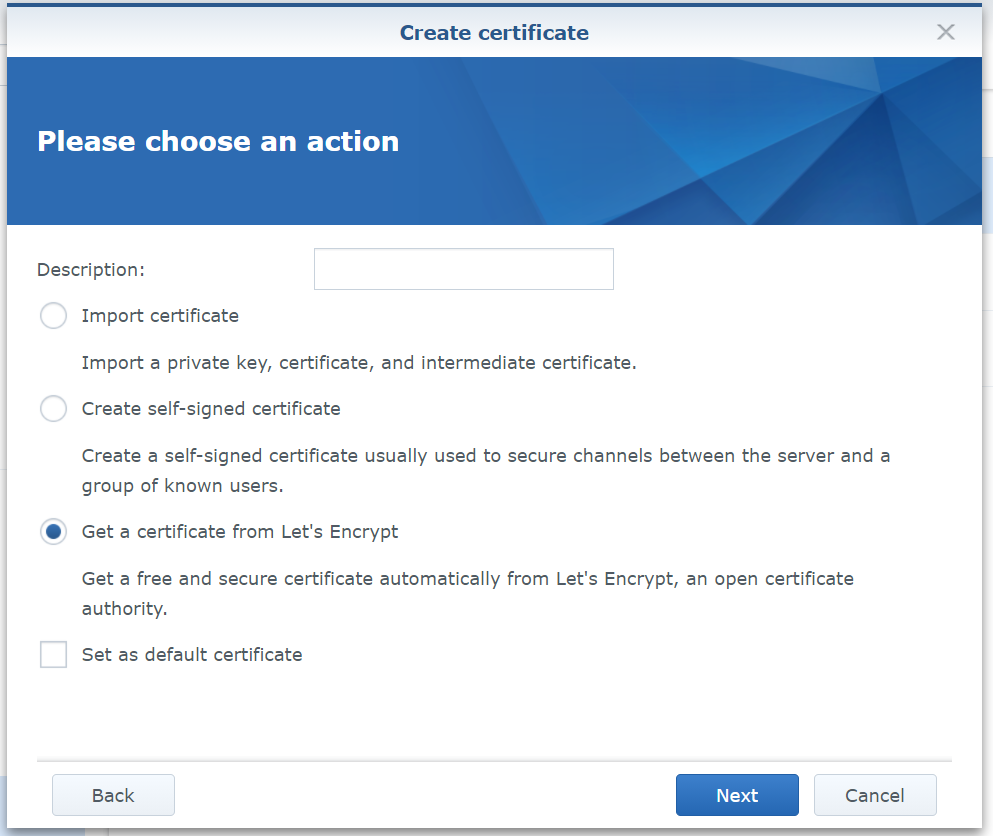
Synology provides a fairly simple way to install a certificate on your NAS. The free service is provided by Let’s Encrypt. Open Control Panel -> Security -> Certificate, and click “Add”.
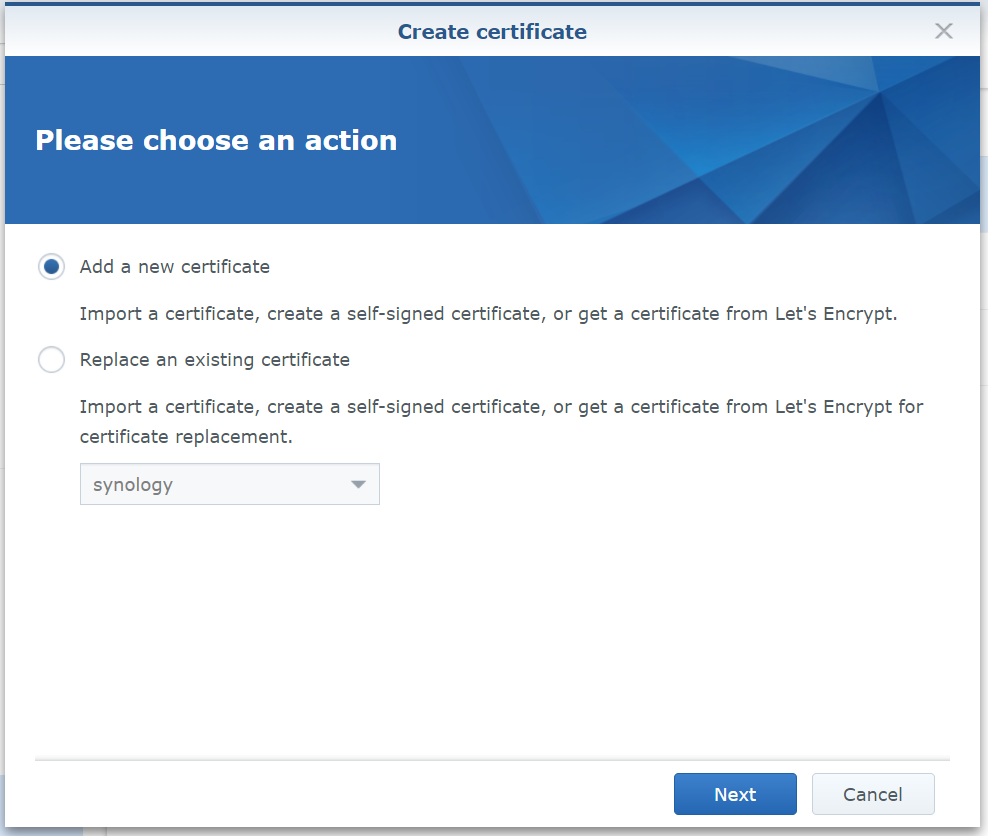
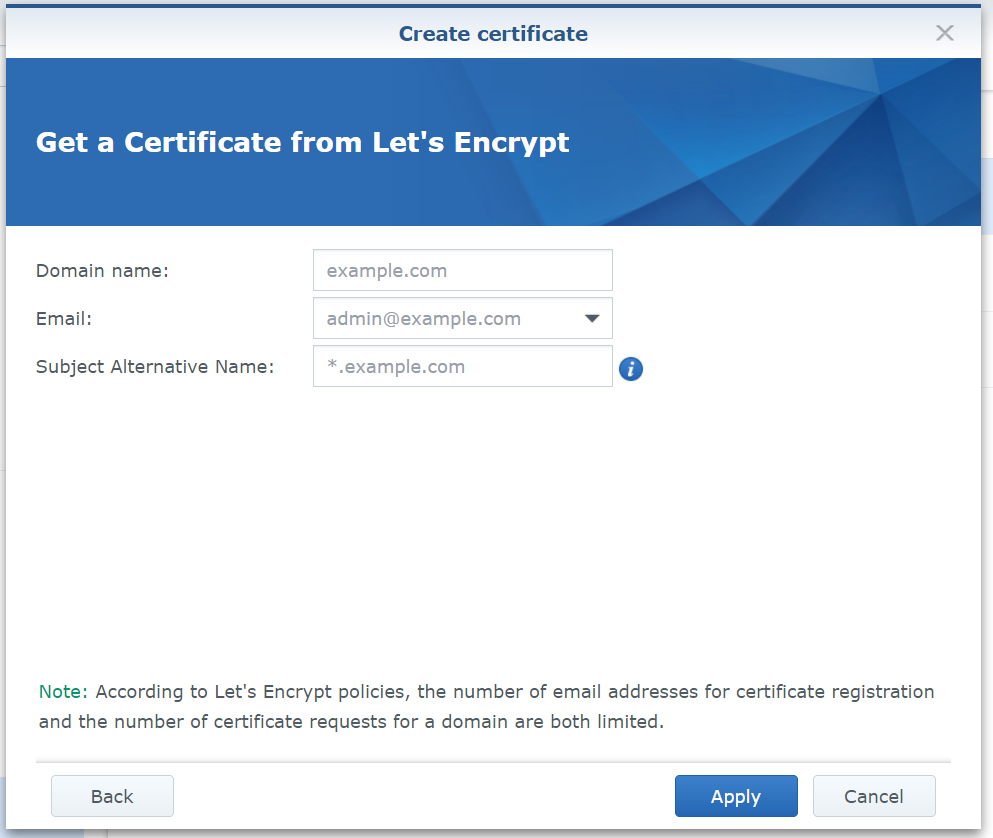
Type in your domain name, email and alternatives. But wildcard is only supported for Synology DDNS 🙁
What You Can Also Do With A Domain Name
CalDAV – Calendar
Want to ditch Google Calendar? No problem! Synology Calendar supports CalDAV and you can sync it with almost every device. iOS calendar app supports CalDAV, but you must have a certificate first.
In iOS settings, go to Account -> Add account -> Other, then select “Add CalDAV Account”. You just need to type in your domain name (don’t forget to start with https and end with :5001), your log in credentials and you’re done.
CardDAV – Contacts
Synology Contacts app supports CardDAV accout. You can following the similar steps to add it to iPhone.
What’s Next…
Right now, your NAS is very functional, providing personal cloud, calendar, contacts, and media server/streaming services. But it has endless features and can satisfy almost all your imagination. In the next chapter, I’ll talk about how to set up WordPress blog on the NAS.
